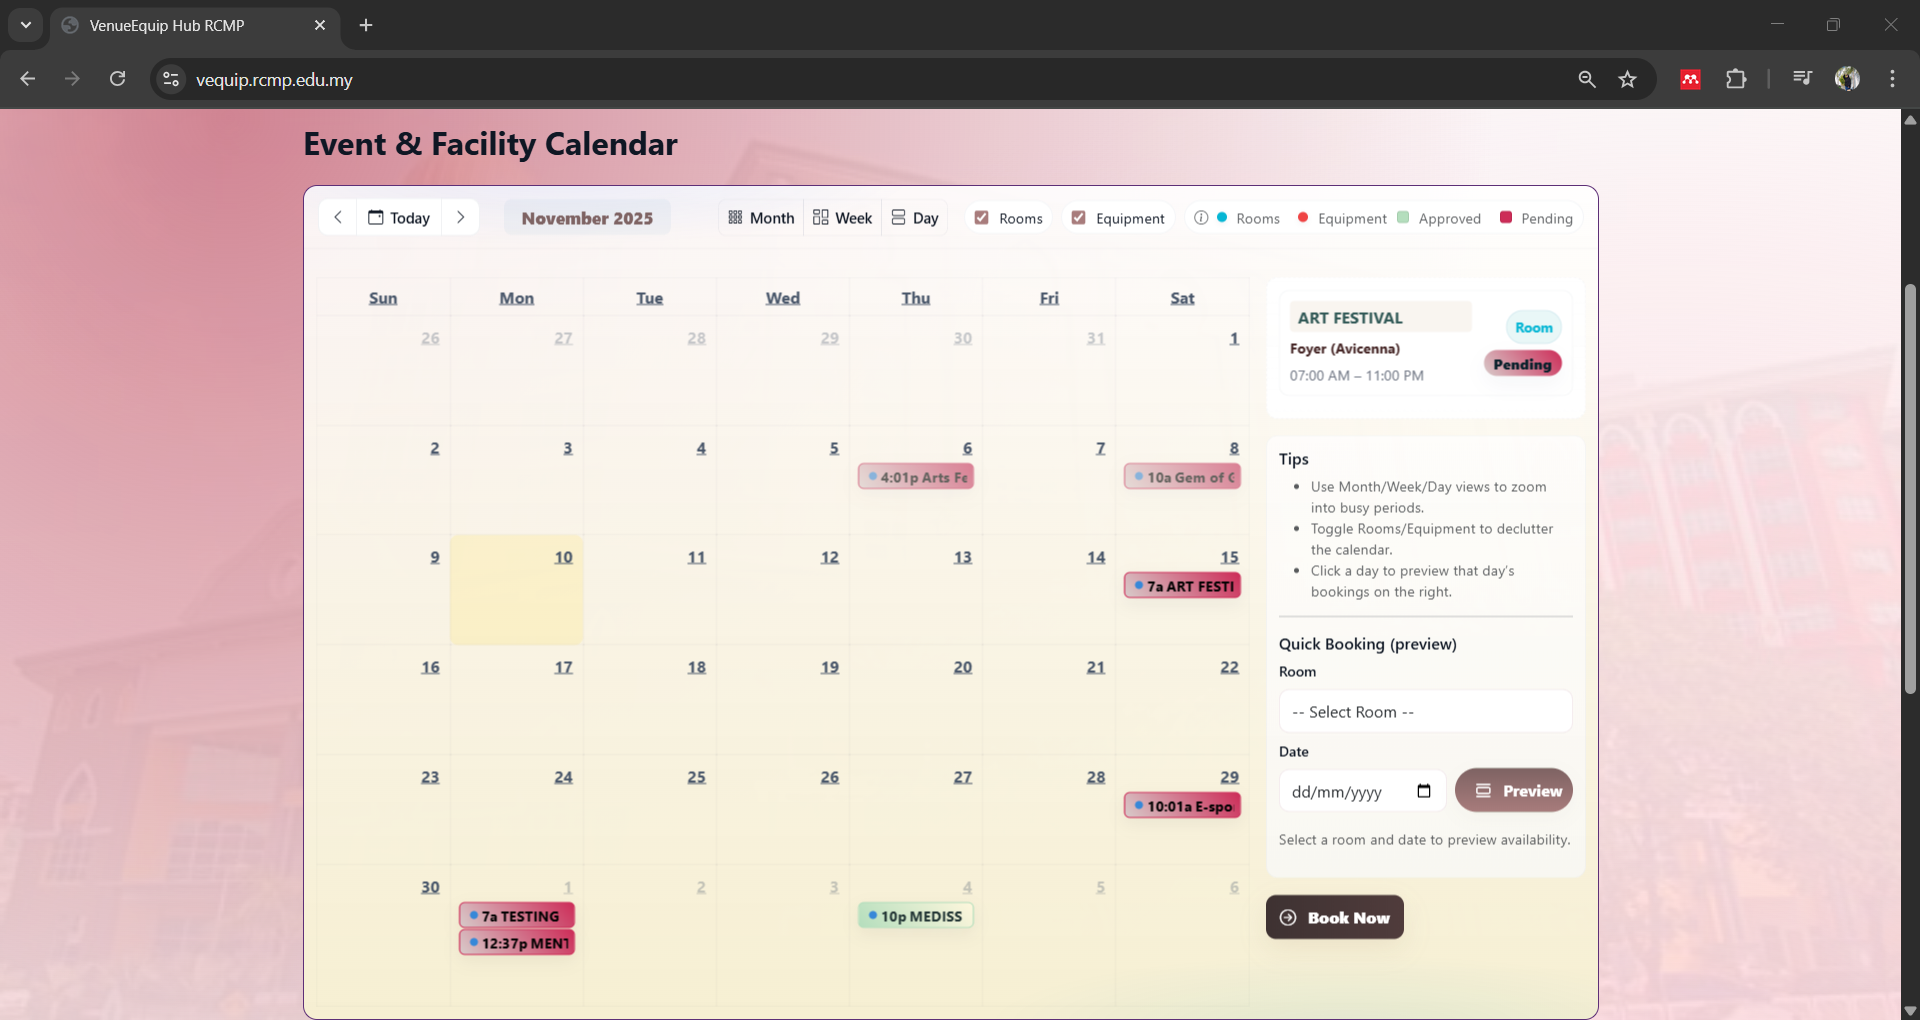
Start with the Event & Facility Calendar
Review all upcoming room and equipment bookings directly from the calendar. This helps you choose a date that does not clash with existing events.
Tip: Focus on your target date first. If the slot looks busy, consider another date before proceeding.
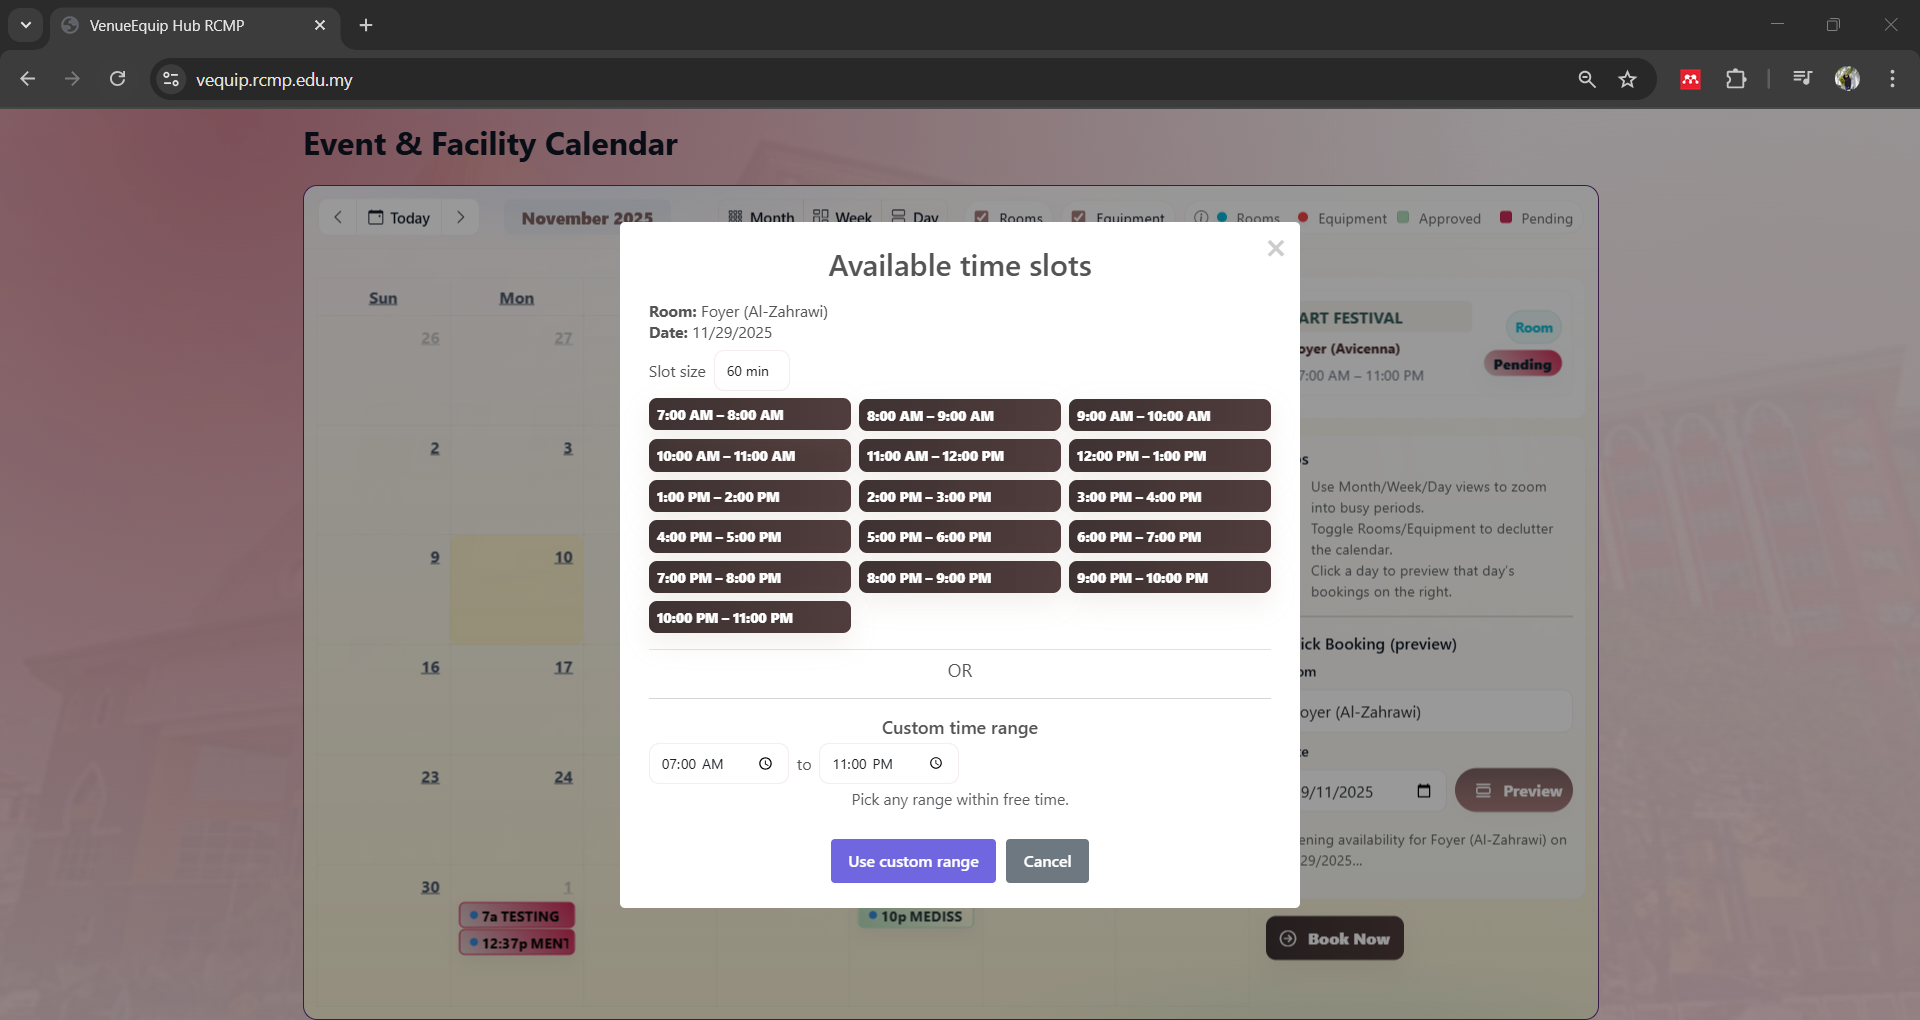
Check Available Time Slots
Use the preview / quick booking feature to see available time slots for your selected room and date. Choose a suggested slot or set a custom time range within the free window.
Make sure your chosen start and end time fall fully inside the available range.
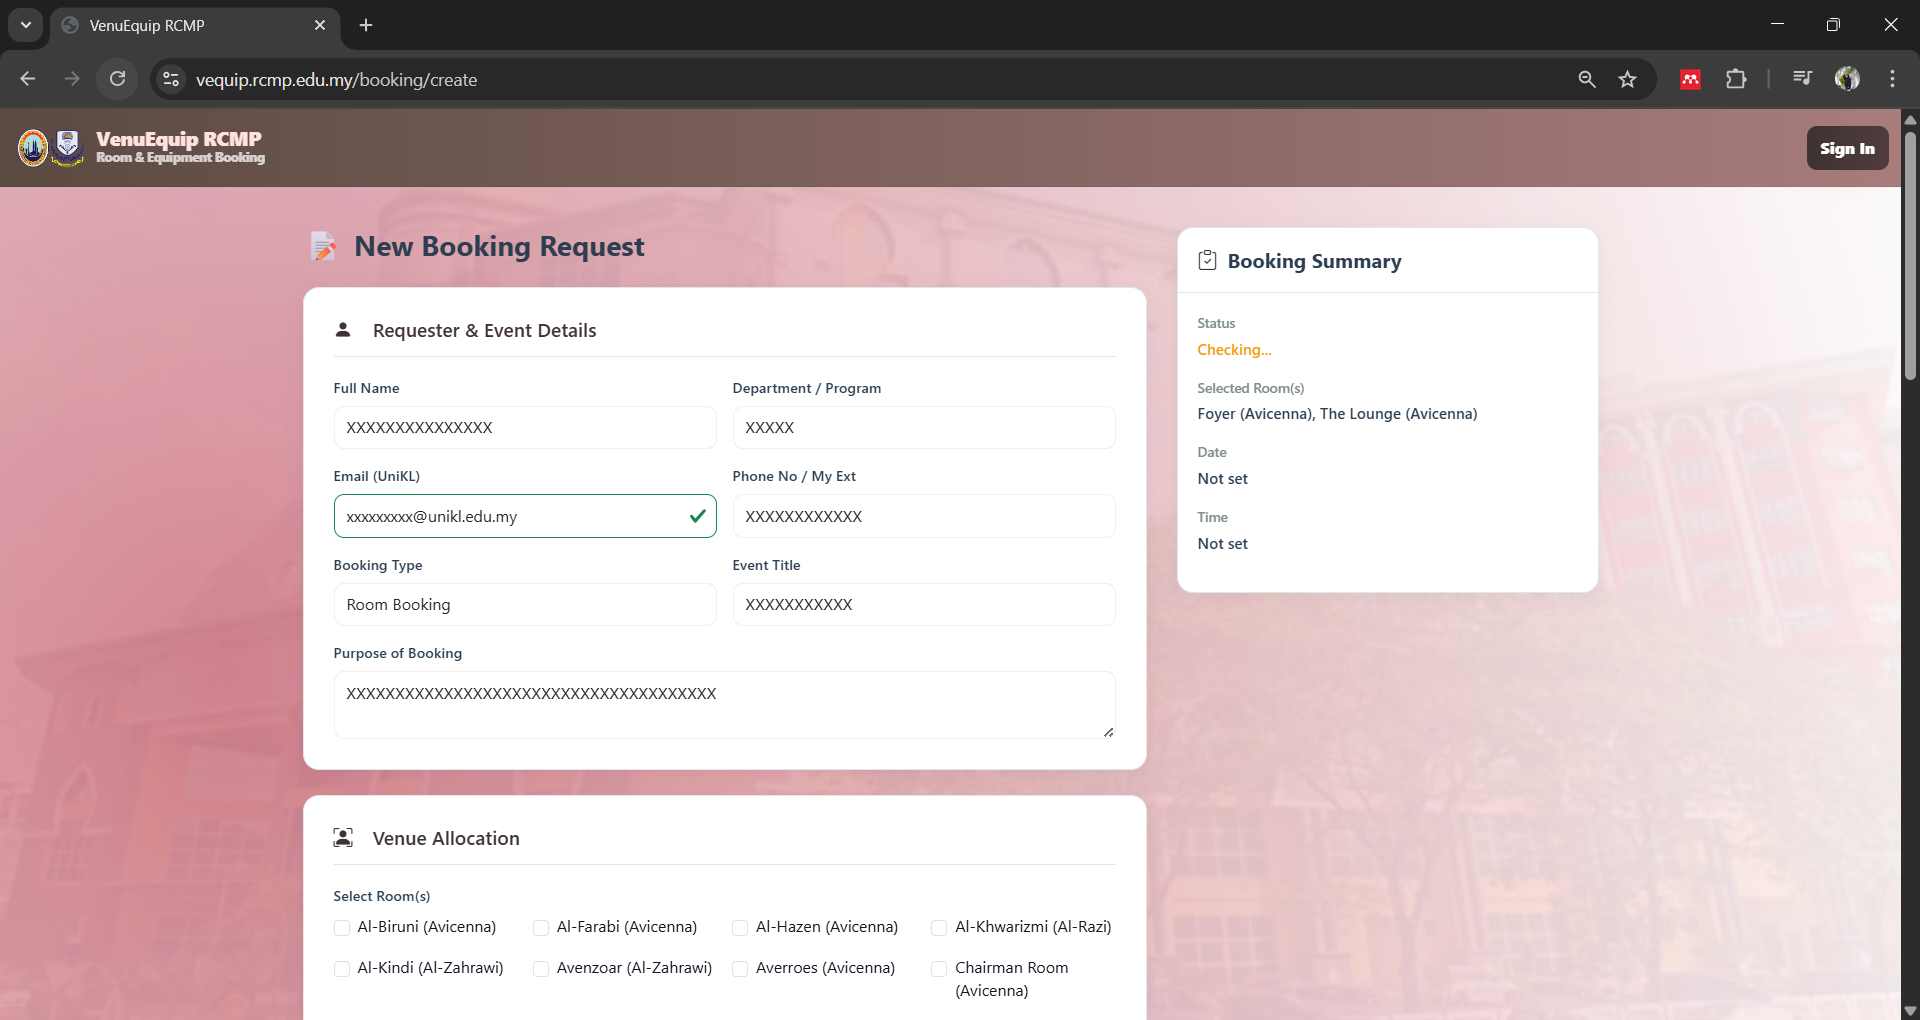
Open the New Booking Request Form
Click “Book Now” to open the full request form. Fill in all required details about your event.
Use your official @unikl.edu.my email. This will be used for all notifications.
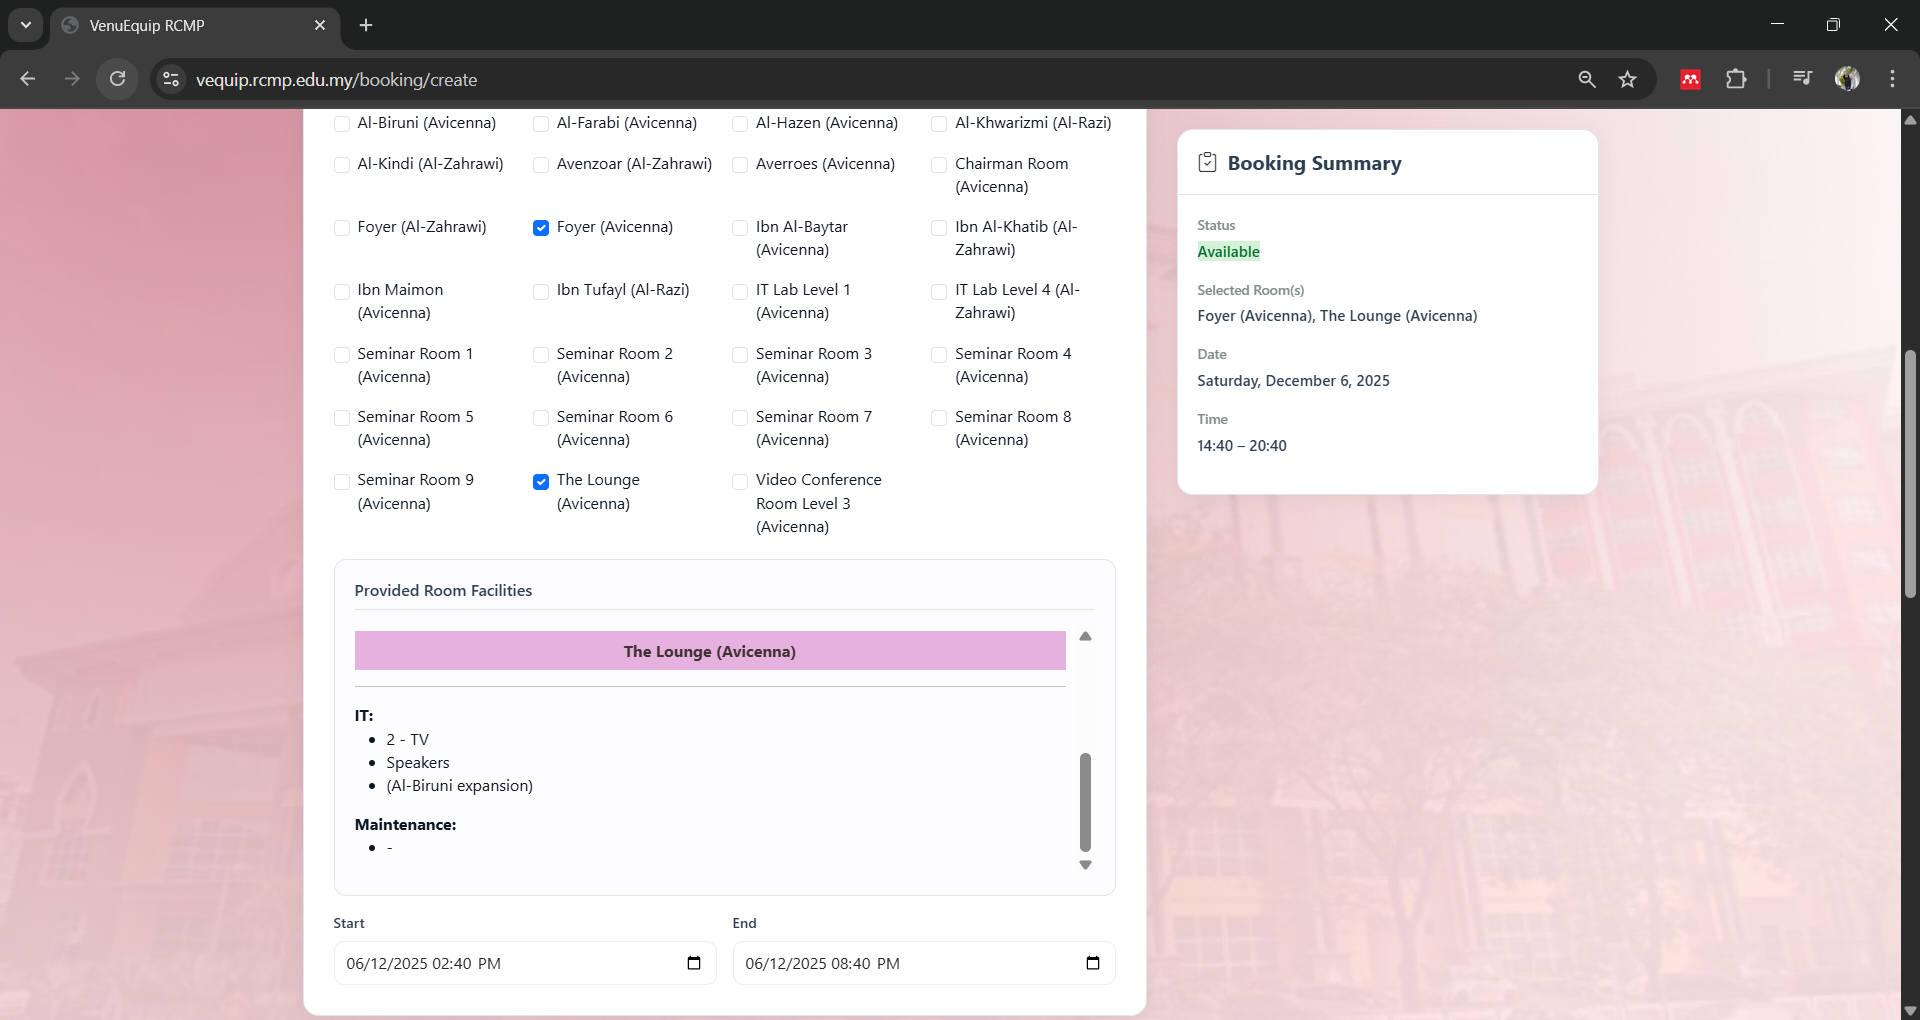
Select Room(s) & Check Facilities
Choose one or multiple rooms for your event. Provided room facilities are listed to help you decide if extra equipment is needed. The Booking Summary panel on the right shows your selected room(s), date and time.
Ensure the chosen rooms match your event size and requirements before moving on.
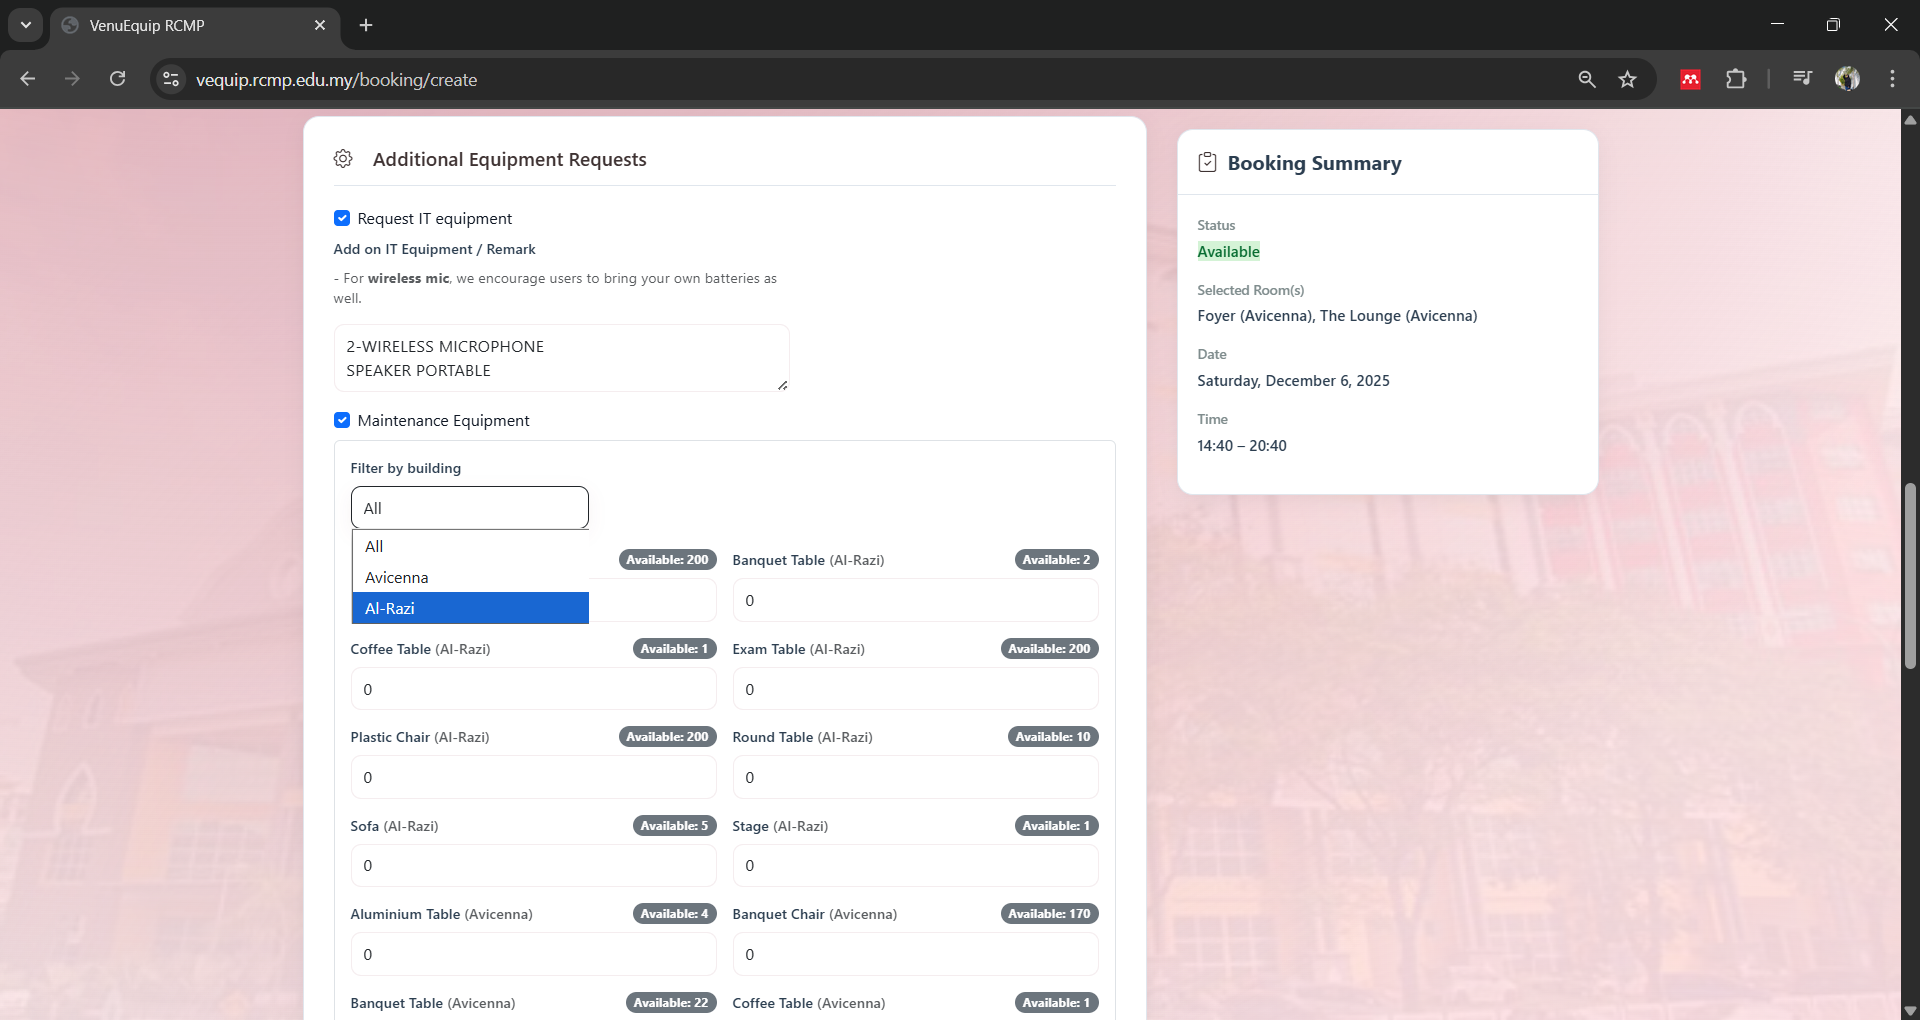
Request Additional Equipment (Optional)
Under Additional Equipment Requests, tick IT equipment (e.g. PA system, projector, wireless mic) and Maintenance items (e.g. tables, chairs, stage) as needed.
Quantities and availability are shown per item. IT & Maintenance teams will verify before final approval.
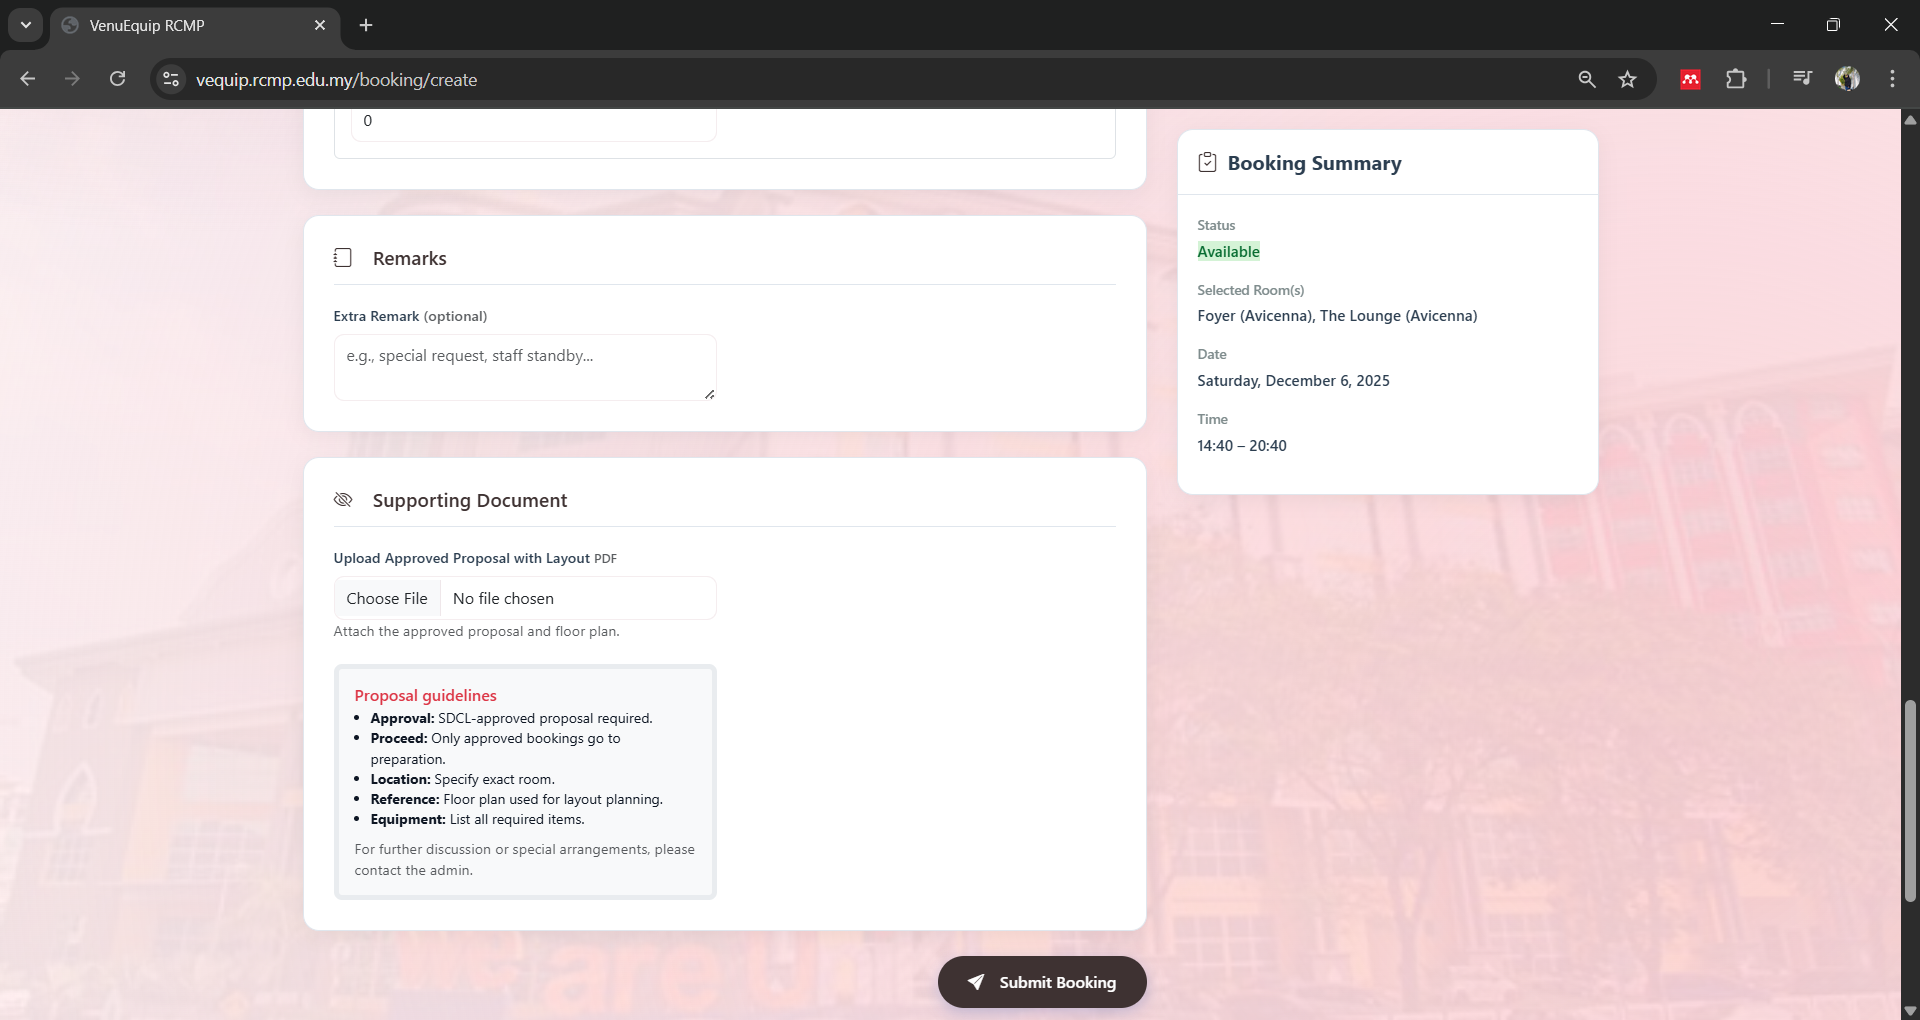
Attach Supporting Documents & Submit
If required, upload the approved proposal and layout plan in PDF format under Supporting Document. Once everything is complete, click “Submit Booking”.
A “Submitting...” loader will appear while the system processes your request. Do not close the page.
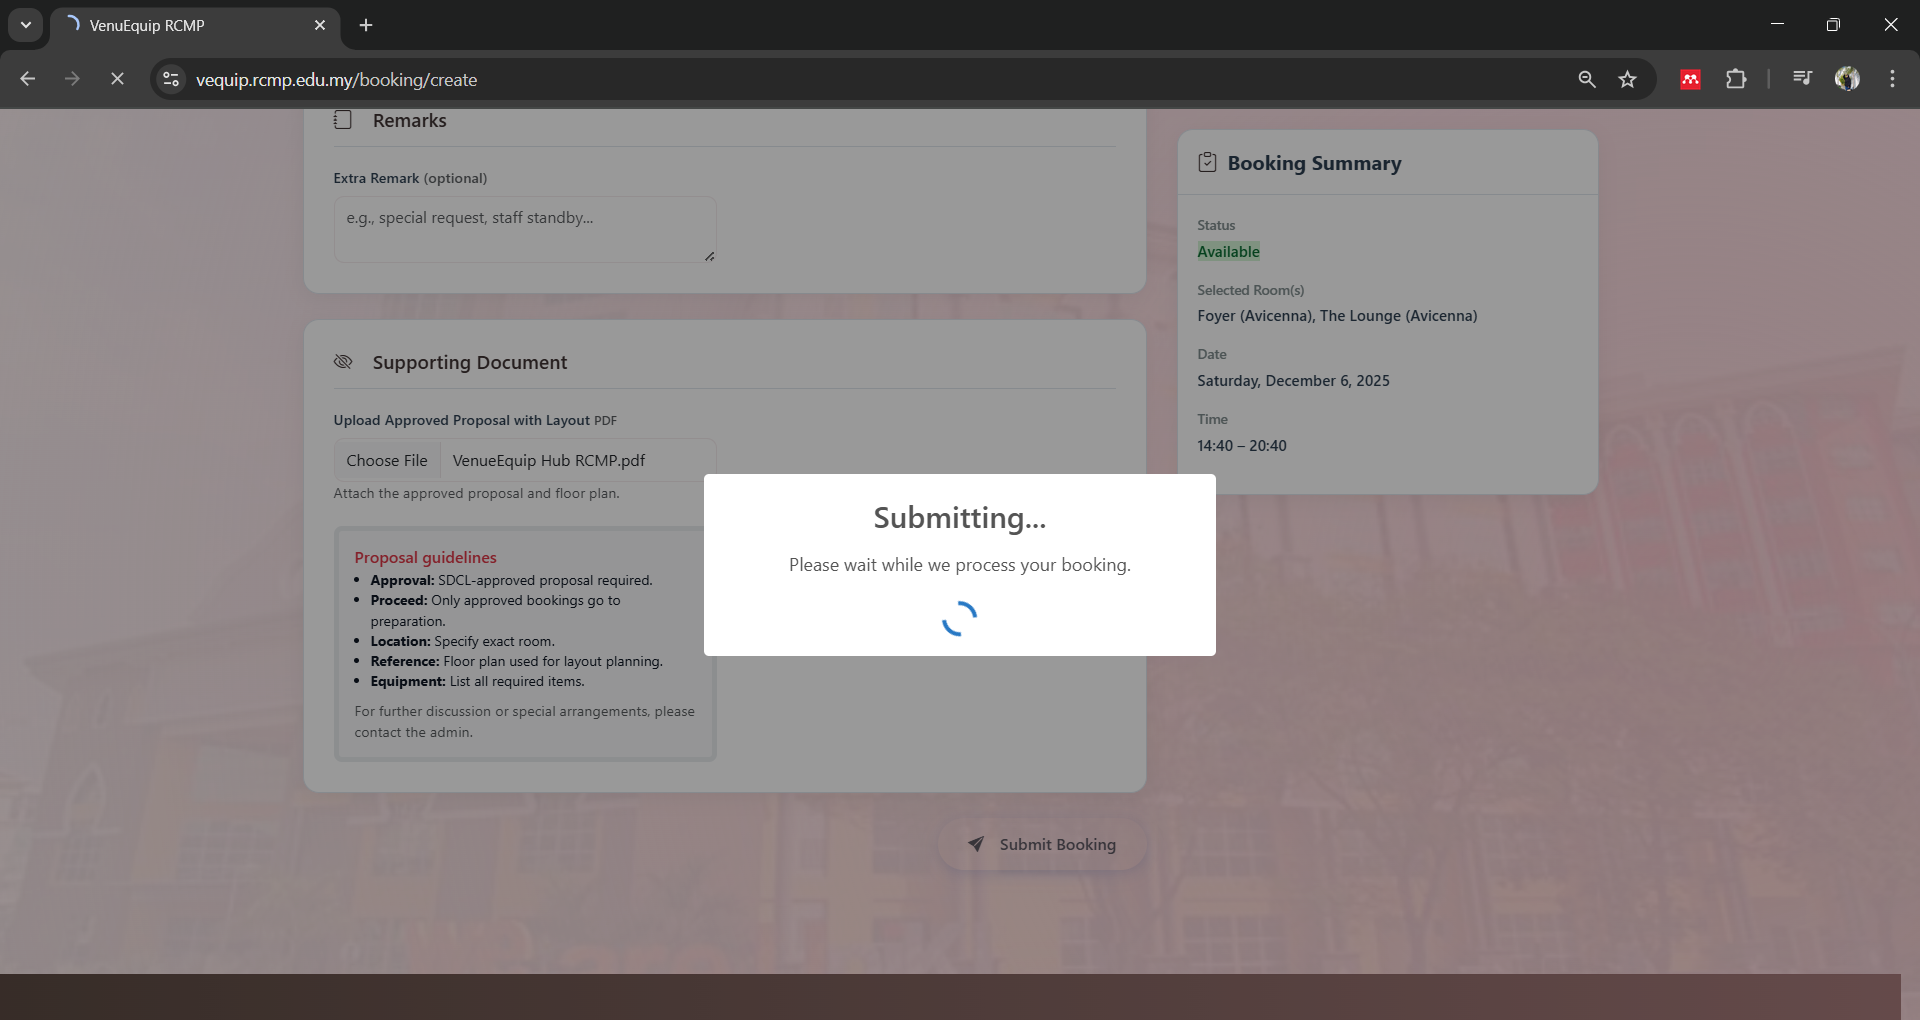
Submitting
Your booking request is being submitted.
A “Submitting...” loader will appear while the system processes your request. Do not close the page.
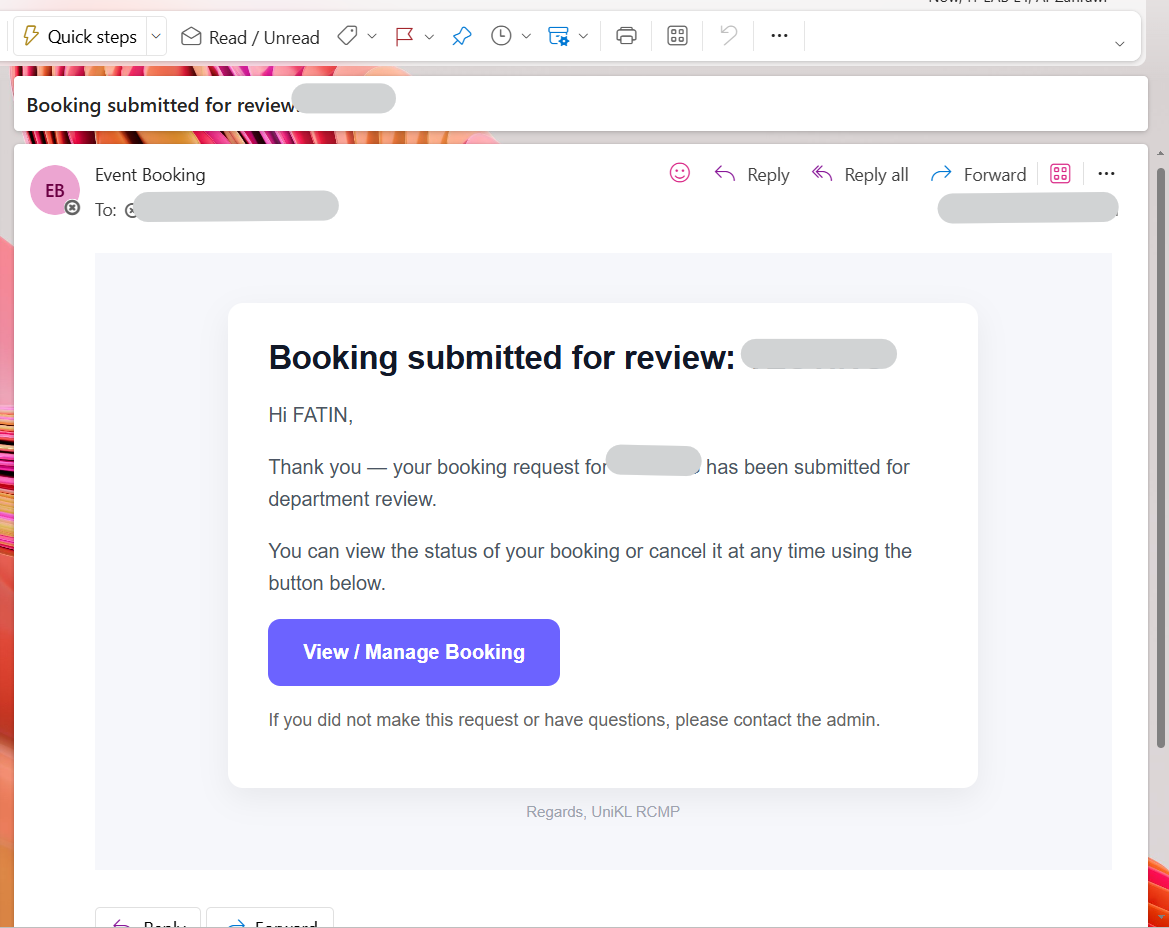
Booking Submitted Successfully
Once successful, a confirmation popup will be displayed. A booking confirmation email (e.g. “Booking submitted for review”) will be sent to your UniKL email. Use the link in the email (if provided) or the given reference to track or manage your booking.
Keep this email for reference. If you did not make the request, follow the instructions in the email or contact the admin.